- Enter the NVIDIA website, www.nvidia.com, go to download drivers and select Linux, FreeBSD and Solaris Drivers under other downloads and support.
- Download the driver that suites your harware in my case i used Latest Legacy GPU version (173.14.xx series).
- download the driver NVIDIA-Linux-x86-173.14.20.pkg1.run
- Press ctrl + alt + f1
- supply the username and password if asked.
- enter sudo /etc/init.d/gdm stop this will stop your x-server in preparation to install the driver
- enter sudo sh /path of your package/NVIDIA-Linux-x86-173.14.20.pkg1.run
- enter sudo reboot
- enjoy your ubuntu 8.10!
Thursday, July 16, 2009
How to install NVIDIA graphics driver to Ubuntu 8.10
After thinking of a way to maximize my U-Box i noticed that Ubunutu 8.10 seem to have a bug on NVIDIA graphics driver, whenever I try to install the driver via hardware drivers. Eventually I managed to install the my graphics driver here is what I did:

Saturday, July 11, 2009
Nokia 5800 XpresMusic Phone
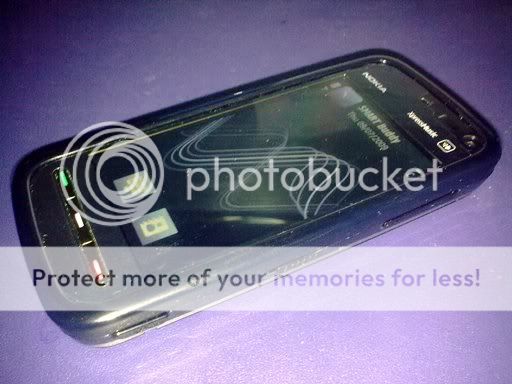
The Nokia 5800 XpresMusic Phone dubbed by some as the "iphone killer" is Nokia's almost all touch screen smart phone. Released on the first quarter of 2009, the phone boast both a hand full of features and some shortcommings. A High-end Phone for an above mid-end price is something that would surely entice any gadget lover.

Here is what you get from the box aside from the phone, the stylus, battery and memory isnt in the picture but it is included in the box. I liked the fact that the Nokia gave a lot of stuff included in the box, considering its price, which is not but nor was it that expensive for this type of phone.

You can see at left side are two slots one is for hot swapping of memory cards ( the phone includes an 8GB memory card, very nice....) and the other is for the SIM card, although unlike the memory card you can only insert it in this fashion if you want to pull it out, you need to remove the battery. The slot of the SIM card slot in my opinion isnt really necessary, why put it in that fashion if you cant use it that way? This is also the location of the speakers which is the best (quality wise) I have heard so far, its also pretty loud and despite its loudness sounds played are still clear.
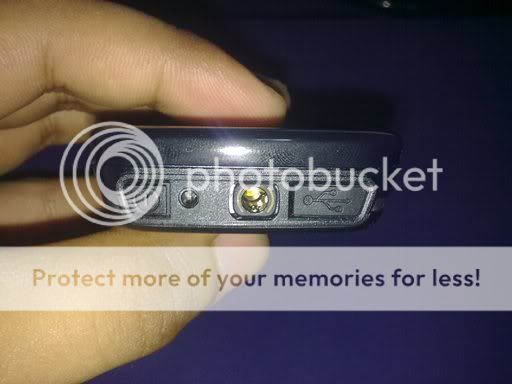
Here is a view on top, almost all external connection are made here, which include, 35mm audio jack, charger slot, USB slot and power switch. I findit convinient that all these connections are placed here,it just made the phone look neat even you connect the USB cable and power jack in. Nokia also made good adding the 35mm Jack since it allows users to use their standard headset. You cant however, charge via USB, dunno why they didnt inlcude that feature, it would have been great to have that included.

The right side of the phone has the volume control, keypad lock and the camera button, these buttons are conviniently placed for easy access.

The back is where you find your 3.5 Mega Pixel Camera (why didnt Nokia used a 5MP camera?..) also you'll find your stylus which is again placed nicely. (The pictures were taken from a Nokia 5800 XpresMusic Phone)
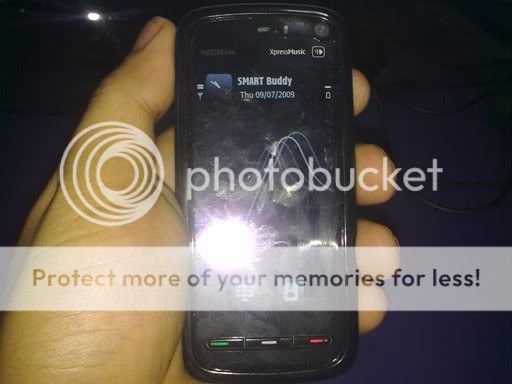
The phone uses symbia S60 Operating System and runs beautifully except for a few instances of lags and slow responses, its very much acceptable. The phone works like any phone the only difference is that its obviously a touch screen device. Nokia also gave its users options on entering text either qwerty or alphanumeric and even a hand writing feature. It also has Wifi and bluetooth so you stay connected if there is an available network. The device also has an accelerometer which allows the screen to change based on how you hold the phone, this can breed softwares that can be very entertaining, Nokia made a sample of this with their racing game, where you need to steer the phone to steer the car, neat! GPS is also included and with its ultra wide screen, im sure you wont loose your way.
I liked the phone, it has a stirdy well developed design combined with Nokia's Symbian Operating System. I think Nokia could have made it better though, but I guess in order to compete with the market they just cut short a few of the features that they could have put in.
I liked the phone, it has a stirdy well developed design combined with Nokia's Symbian Operating System. I think Nokia could have made it better though, but I guess in order to compete with the market they just cut short a few of the features that they could have put in.
Wednesday, July 8, 2009
How to Change Workgroup name in Ubuntu
This blog was posted at http://archangel-025.blogspot.com/2009/06/how-to-change-workgroup-name-in-ubuntu.html last June 11, 2009
I am assuming that the version of Ubuntu being used already has Samba Installed otherwise please refer to www.ubuntu.com
1. Go to Applications > Accessories > Terminal
2. At the Terminal type the command
sudo gedit /etc/samba/smb.conf
3. Scroll Down and at the workgroup = workgroup, simply change the workgroup name and press enter
4. Restart Samba, at the terminal type
sudo /etc/init.d/samba restart
I am assuming that the version of Ubuntu being used already has Samba Installed otherwise please refer to www.ubuntu.com
1. Go to Applications > Accessories > Terminal
2. At the Terminal type the command
sudo gedit /etc/samba/smb.conf
3. Scroll Down and at the workgroup = workgroup, simply change the workgroup name and press enter
4. Restart Samba, at the terminal type
sudo /etc/init.d/samba restart
Mapping Windows Network Drive to Ubuntu
This blog has been posted at http://archangel-025.blogspot.com/2009/02/mapping-windows-network-drive-to-ubuntu.html last February 10, 2009
Its been a while since I figured out how to map a windows network drive to an Ubuntu Operating System. This is very useful especially if your office is using different types of Operating Systems.
Here are the steps:
1. On your Ubuntu Desktop, click on the places tab, which is usually found at the upper left portion, in between application and system and choose "connect to server" option
2. At the service type choose windows share, and simply fill up all the details:
- the server is the name of the pc where you want to connect(use the computer name)
- share is the folder name of the shared folder
- user name is the name of your pc
- domain name is your workgroup
- name to use in your connection is name that you would like to use
3. simply double click on the connect icon and the detwork drive should show up on your desktop
Here are the steps:
1. On your Ubuntu Desktop, click on the places tab, which is usually found at the upper left portion, in between application and system and choose "connect to server" option
2. At the service type choose windows share, and simply fill up all the details:
- the server is the name of the pc where you want to connect(use the computer name)
- share is the folder name of the shared folder
- user name is the name of your pc
- domain name is your workgroup
- name to use in your connection is name that you would like to use
3. simply double click on the connect icon and the detwork drive should show up on your desktop
Mapping Windows Network Drive to Ubuntu
Its been a while since I figured out how to map a windows network drive to an Ubuntu Operating System. This is very useful especially if your office is using different types of Operating Systems.
Here are the steps:
1. On your Ubuntu Desktop, click on the places tab, which is usually found at the upper left portion, in between application and system and choose "connect to server" option
2. At the service type choose windows share, and simply fill up all the details:
- the server is the name of the pc where you want to connect(use the computer name)
- share is the folder name of the shared folder
- user name is the name of your pc
- domain name is your workgroup
- name to use in your connection is name that you would like to use
3. simply double click on the connect icon and the detwork drive should show up on your desktop
Here are the steps:
1. On your Ubuntu Desktop, click on the places tab, which is usually found at the upper left portion, in between application and system and choose "connect to server" option
2. At the service type choose windows share, and simply fill up all the details:
- the server is the name of the pc where you want to connect(use the computer name)
- share is the folder name of the shared folder
- user name is the name of your pc
- domain name is your workgroup
- name to use in your connection is name that you would like to use
3. simply double click on the connect icon and the detwork drive should show up on your desktop
OSIST
This blog was posted at http://archangel-025.blogspot.com/2009/02/osist.html last February 16, 2009
 OSIST stands for "One Stop Information Shop of Technologies in the Philippines". The web site is a project of the Philippine Council for Industry and Energy Research and Development (PCIERD) of the Department of Science and Technology (DOST) from the Philippines. The website is basically a way for PCIERD to present to the public the number of technololgies available from the Department, whats interesting to note is that these technologies are products of researches and is now ready to be presented and be used by the public, also the website has been nominated as a finalist in the WSA Global Contest and the 11th Philippine Web Awards (PWA) e-Government Category.
The general appearance of the website is very neat, with a very clean look, there is not much clutter and shows only the information relevant to its purpose in a very clear manner. The main options are very visible at the left panel of the site which offers the available technologies, guest book, related links, and a web forum. The left panel also contains the search option of the website, which is very useful since the site contains a lot of technologies making searches easy for any user who wishes to visit the site.
The site shows at the front page the News & Updates and Success Stories, which allows visitors to read the things that are happening about the technologies being presented at the website. This adds credibility to the website and a good source of information especially to first time visitors. The right panel contains the "Most Visited Technology" section, this is a great section for showing all those topics and technologies that are usually being asked by the public, this gives visitors an idea of the content as well as a tool to help visitors look for the technologies that they need. Aside from the basic options, another feature of the site that is really helpful is the option to increase the font size of the content, allowing users to see the content at a font size of their liking.
Access to the website is easy the url si http://www.osist.dost.gov.ph or you can click here to visit the site. I tried to access the site from home and at the office, using different browsers and connection was a breeze, provded of course you have good internet connection and a decent computer.
In all, the site is very well built, Its nice to visit a website that does very good on what its supposed to do, and the OSIST website a very good example. Though not the most fancy of websites with minimal graphic designs that is pretty much acceptable as it removes weight in browsing and showing only the things that you need to see. A very functional website I recommend this website to be a sure winner.
You can vote through the url http://www.philippinewebawards.com/pages/register.asp.
 OSIST stands for "One Stop Information Shop of Technologies in the Philippines". The web site is a project of the Philippine Council for Industry and Energy Research and Development (PCIERD) of the Department of Science and Technology (DOST) from the Philippines. The website is basically a way for PCIERD to present to the public the number of technololgies available from the Department, whats interesting to note is that these technologies are products of researches and is now ready to be presented and be used by the public, also the website has been nominated as a finalist in the WSA Global Contest and the 11th Philippine Web Awards (PWA) e-Government Category.
The general appearance of the website is very neat, with a very clean look, there is not much clutter and shows only the information relevant to its purpose in a very clear manner. The main options are very visible at the left panel of the site which offers the available technologies, guest book, related links, and a web forum. The left panel also contains the search option of the website, which is very useful since the site contains a lot of technologies making searches easy for any user who wishes to visit the site.
The site shows at the front page the News & Updates and Success Stories, which allows visitors to read the things that are happening about the technologies being presented at the website. This adds credibility to the website and a good source of information especially to first time visitors. The right panel contains the "Most Visited Technology" section, this is a great section for showing all those topics and technologies that are usually being asked by the public, this gives visitors an idea of the content as well as a tool to help visitors look for the technologies that they need. Aside from the basic options, another feature of the site that is really helpful is the option to increase the font size of the content, allowing users to see the content at a font size of their liking.
Access to the website is easy the url si http://www.osist.dost.gov.ph or you can click here to visit the site. I tried to access the site from home and at the office, using different browsers and connection was a breeze, provded of course you have good internet connection and a decent computer.
In all, the site is very well built, Its nice to visit a website that does very good on what its supposed to do, and the OSIST website a very good example. Though not the most fancy of websites with minimal graphic designs that is pretty much acceptable as it removes weight in browsing and showing only the things that you need to see. A very functional website I recommend this website to be a sure winner.
You can vote through the url http://www.philippinewebawards.com/pages/register.asp.
How to add a password to a guest account in Windows XP
This blog was posted at http://archangel-025.blogspot.com/2009/02/how-to-add-password-to-aguest-account.html last February 23, 2009.
In the today's world security should always be your top priority and that includes one of the most indispensable machines in everyday life, our computers. Here is simple step to add security in your beloved personal computers who uses windows xp as their operating systems, specially if your connected to a network.
Here is a common workplace scenario, your at an office who shares not only computers but files as well through the shared folder of each computer. This is a good way to save cost and at the same time improve efficiency through networking, but of the draw backs is the security issue, since all in the network can see you and all can use your computer whenever your not around. The solution, create a guest account and add a password, this allows you to let people use the guest account if they dont have any account on a particular PC, and also it allows you to choose which people in the network can access your PC, here are the steps:
1. Go to start and choose control panel;
2. Select User accounts and turn on the Guest Account
3. Go back to the control panel and choose Administrative Tools and select Computer Management;
4. Click on the folder "Local Users and Groups"
5. Right click on the Guest and select set password
6. Add the password of your choice and let the people you want to know the password.
Here is a common workplace scenario, your at an office who shares not only computers but files as well through the shared folder of each computer. This is a good way to save cost and at the same time improve efficiency through networking, but of the draw backs is the security issue, since all in the network can see you and all can use your computer whenever your not around. The solution, create a guest account and add a password, this allows you to let people use the guest account if they dont have any account on a particular PC, and also it allows you to choose which people in the network can access your PC, here are the steps:
1. Go to start and choose control panel;
2. Select User accounts and turn on the Guest Account
3. Go back to the control panel and choose Administrative Tools and select Computer Management;
4. Click on the folder "Local Users and Groups"
5. Right click on the Guest and select set password
6. Add the password of your choice and let the people you want to know the password.
Subscribe to:
Posts (Atom)